What you need:
- 2 pieces of Fleece: 2-2.5 yards will do depending on how tall the blanket user is. I like big blankets so I use 2.5 yards.
- FABRIC scissors. When dealing with sewing its always smart to have a certain pair of scissors that you ONLY use on fabric.
- A large enough space to lay your fabric out flat and sit around it. I use my living room floor.
- Confidence! You really can't mess this blanket up too badly so don't stress it!
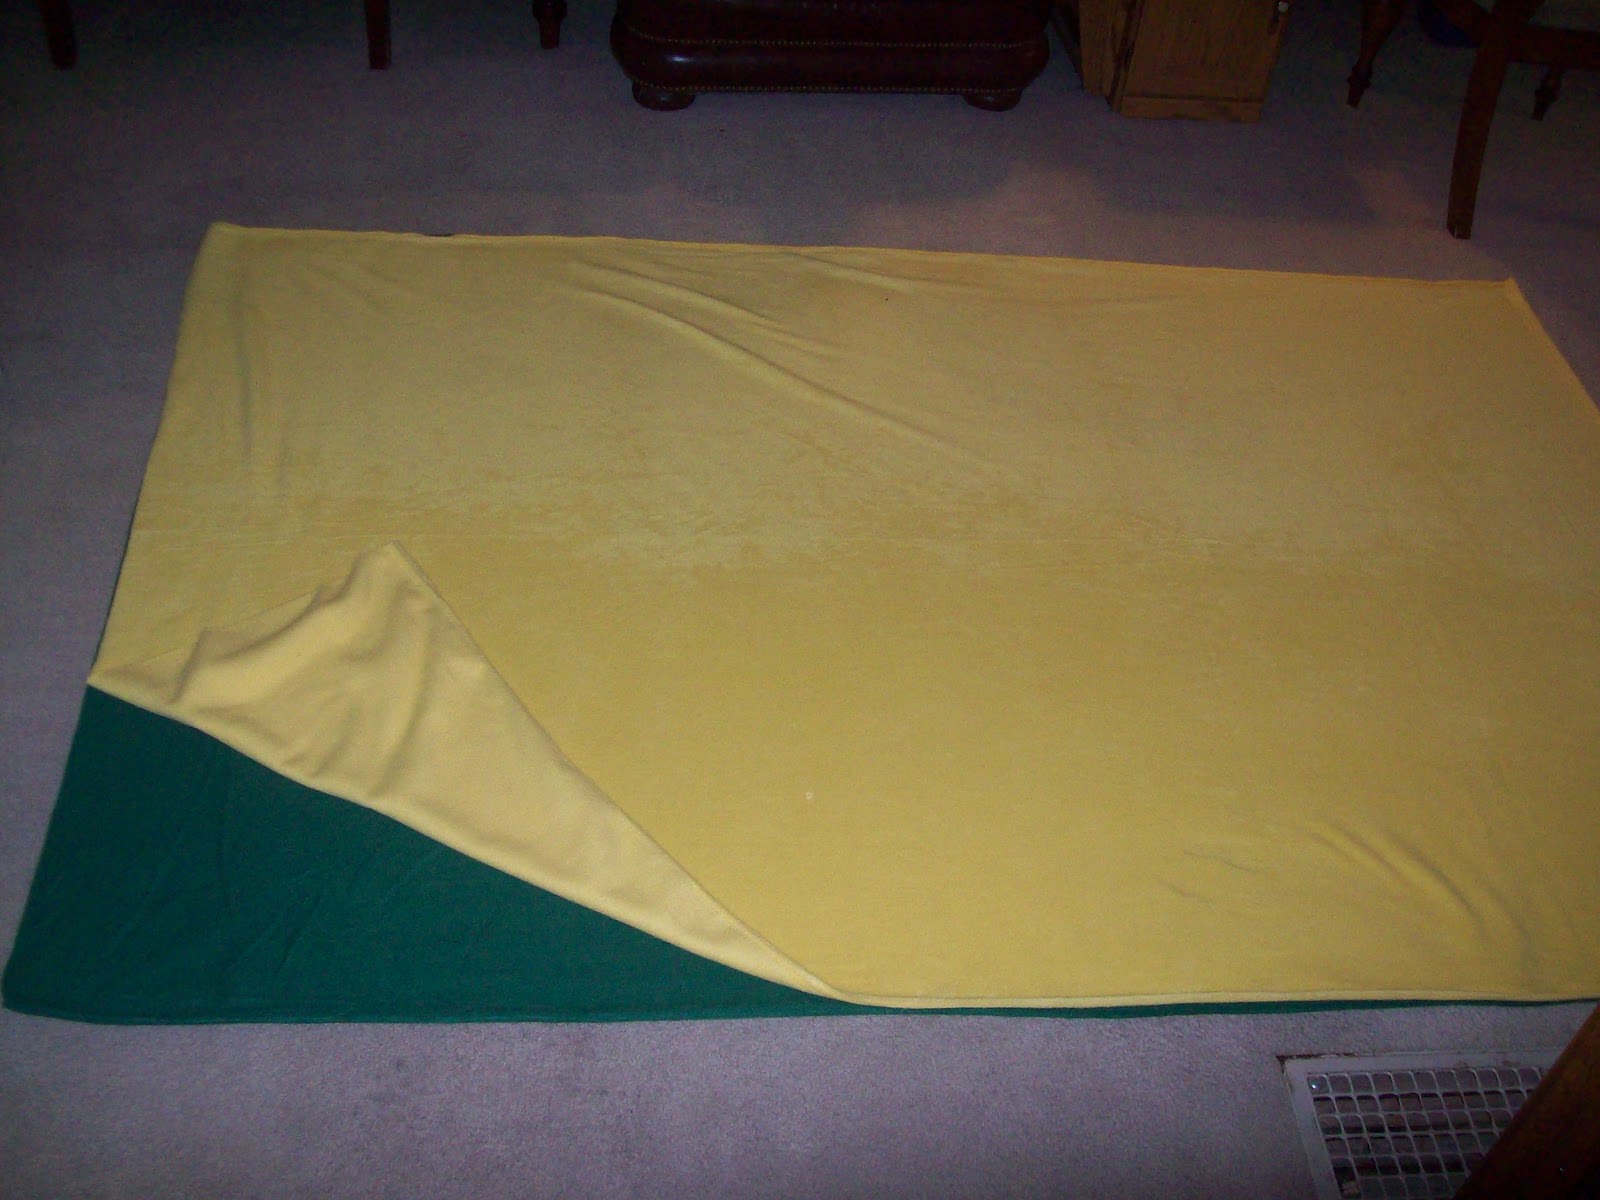
Lay your fleece pieces on top of each other. If one(or both) is printed make sure the tops face away from each other. Line up your edges and corners and smooth your fabric out.
Step 2.
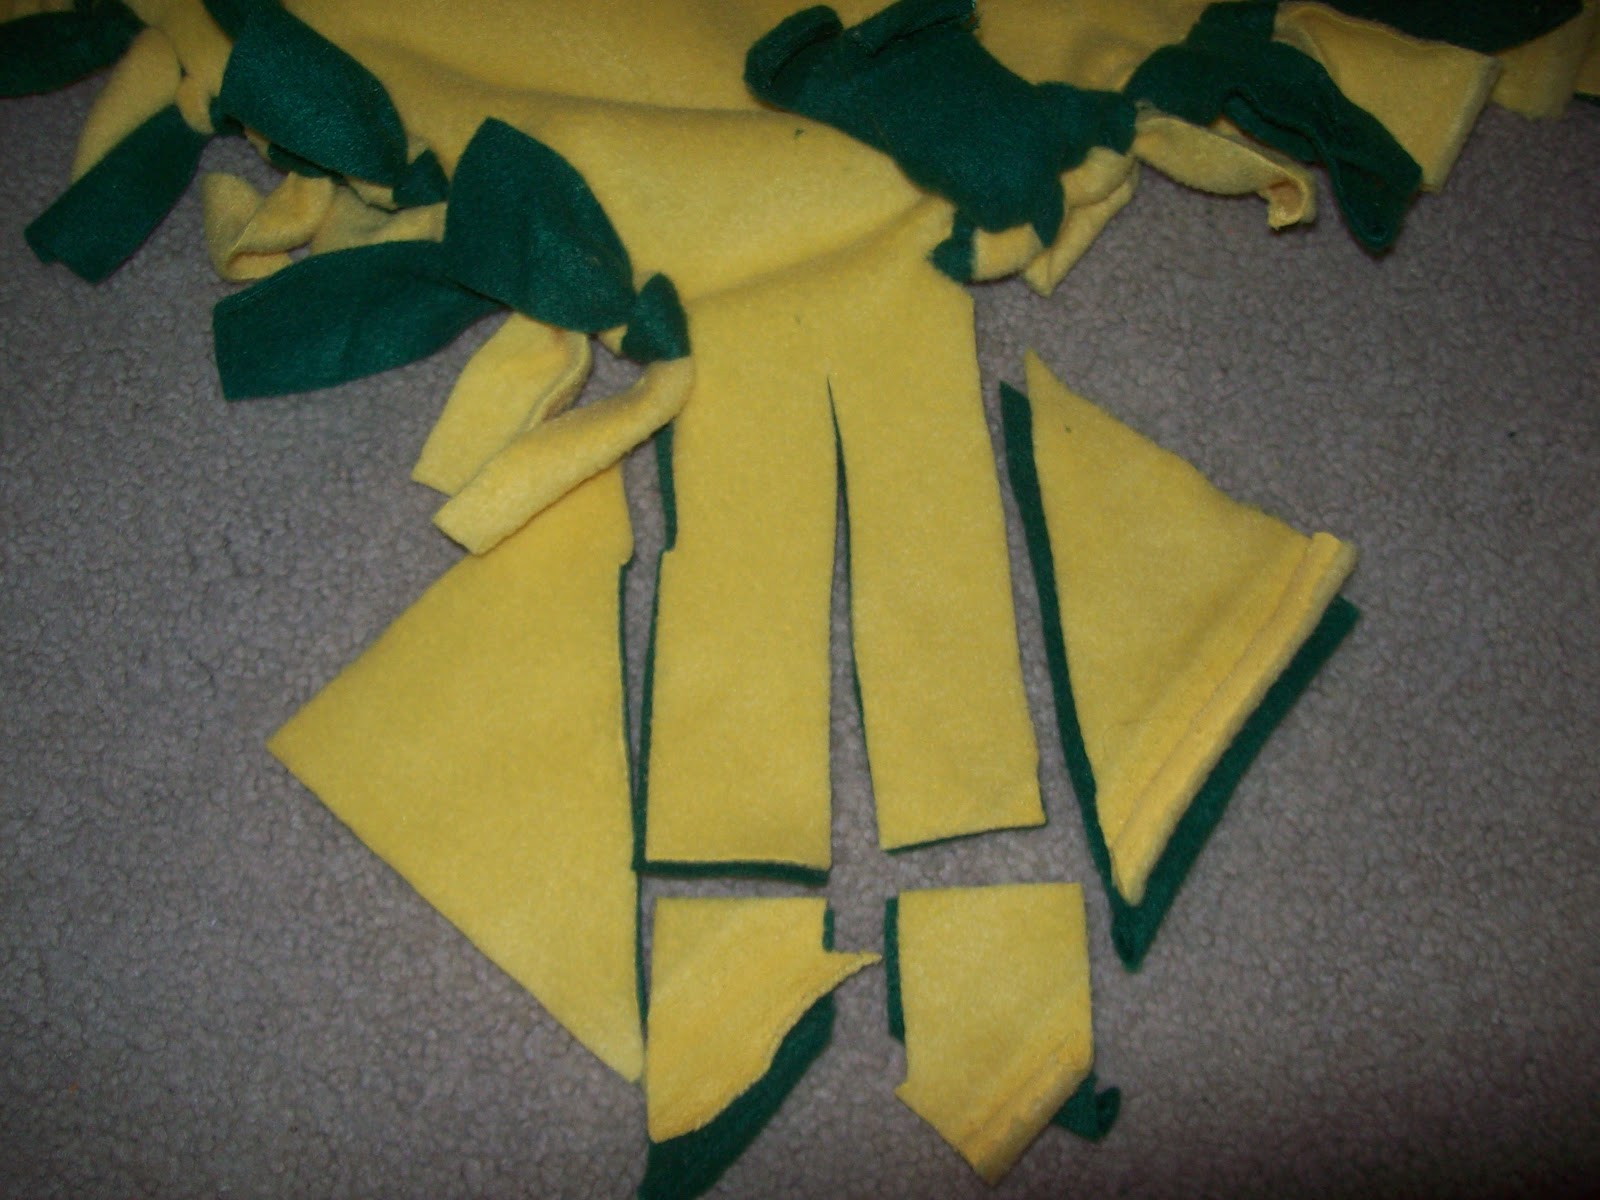
Get your SCISSORS! I usually start cutting on a short end of the blanket, creature of habit I guess. Make your first cut about 10in. from the left hand corner. Make your strip 8in long and 2-3in wide. See picture below:

Step 3.
Make some knots! This ill make sure that the bottom color shows on the top.


Then knot your bottom to your top. This ill make sure that the bottom color shows on the top.
Keep cutting and knotting all the way down the side. I usually cut a few, knot them, cut more, etc. Stop when you get 8-10in away from your next corner.

The corner!!! I get more questions about the corners than anything else. They can be pretty tricky but I think I've found an efficient way to get them done. Start on your next side just like you did the first one, Leaving a square of fabric in the corner.


Good Luck and Happy Crafting!
I just made my first blanket with the help of your terrific directions and photos. The only problem that I ran in to was after it was finished all the sides were curled inwards ~ I solved the problem by tugging along the edges all the way around and I think that may have straightened it out. Do you think I may have tied the knots to tight?? Thanks for posting such great directions and the photos really helped me understand the whole scary corner thing.....
ReplyDeleteIt's natural for them to curl up and you did the perfect thing. I usually give them a little tug as I go along. I'm so glad the post was helpful and thank you for sharing your experience! You never know if people actually see these things when you put them out into the world! haha So thank you for the feedback and happy crafting :)
ReplyDelete